Seen Lot of questions/help in many forums on the SCCM client issues
like client is not reported in SCCM console ,site code unsuccessful,
Client is installed but Console shows NO and other problems.
Thought of preparing basic check list that will help configmgr guys to start troubleshooting the issue and fix the problem.
Here is the check list which i have prepared to follow in brief when you do perform client installation using your method .
There are a various types of Client deployment methods that are available to you when installing the client. Each has its advantages and disadvantages along with the need to meet specific business requirements.
If you choose to go SCCM client push installation method, Ensure you have created Client push installation account which should have Admin rights on the target computer else it may fail .Client push installation Step by Step Guide is here http://technet.microsoft.com/en-us/library/bb632380.aspx and if you need how to configure it with screen shots ,step by step ,follow Windows-Noob
Once you initiated the Client push installation from SCCM console( right click on computer,select install client etc ), immediatly , you can start monitoring CCM.log from your <SCCM installation folder:>\Logs. For more info on , how SCCM client push installation works,please refer this article for process and troubleshooting .
The procedure is same what ever the installation method you choose.The CCMSETUP.EXE will be downloaded to the system (c:\windows\ccmsetup\logs) and is executed. The ccmsetup.exe reads the manifest file (and also mobileclient.tcf) and fetches the remaining files(prerequisites files listed below ) that are required for the installation.
Some of the components that are used in the client deployment process includes the following:
Below are the SMS Related services which should (applicability depends on the client perform actions let say BITS is not used when you run the Application from DP) be running on the Client to be healthy all the time.
CCMSETUP.LOG----->Logs the Client installation activities
ClientIDManagerStartup.log-->Records the creation and maintenance of client GUIDS and also the registration status of the client computer. you should look at this log if the client registration is completed or not before it reports to console.
ClientLocation.log----> Records site assignment tasks. Can help to troubleshoot scenarios where the client is not assigned to a Configuration Manager site.
LocationServices.log---> Records attempts to find management points and distribution points.Can help to troubleshoot scenarios where the client cannot find a management point or distribution point.
After reading above logs,you should see that,client is able to registered and able to talk to Management point.
You can now open the configuration manager Applet from control Panel and go to actions tab,check if you are able to if you are able to see more than 5 actions(total around 11) displaying or not which means that client is healthy and is ready/sent its inventory information to SCCM site server. You should be able to see the Client with SCCM client Installed and assigned Yes

more information about SCCM client log files,please refer TechNet
Now its time to do the actual troubleshooting why client is not getting the above policy agents or not reported to SCCM console with Client YES and Installed YES
If you have any questions /feedback on the check list ,you can always leave a reply via comments section.
Thought of preparing basic check list that will help configmgr guys to start troubleshooting the issue and fix the problem.
Here is the check list which i have prepared to follow in brief when you do perform client installation using your method .
There are a various types of Client deployment methods that are available to you when installing the client. Each has its advantages and disadvantages along with the need to meet specific business requirements.
If you choose to go SCCM client push installation method, Ensure you have created Client push installation account which should have Admin rights on the target computer else it may fail .Client push installation Step by Step Guide is here http://technet.microsoft.com/en-us/library/bb632380.aspx and if you need how to configure it with screen shots ,step by step ,follow Windows-Noob
Once you initiated the Client push installation from SCCM console( right click on computer,select install client etc ), immediatly , you can start monitoring CCM.log from your <SCCM installation folder:>\Logs. For more info on , how SCCM client push installation works,please refer this article for process and troubleshooting .
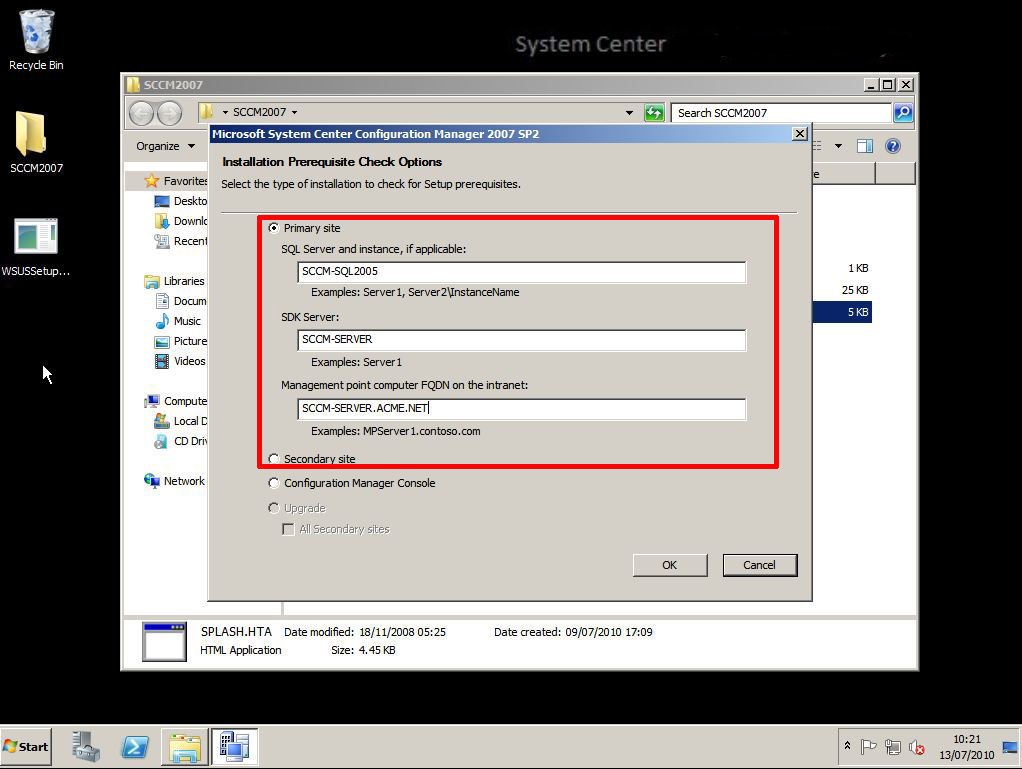
The procedure is same what ever the installation method you choose.The CCMSETUP.EXE will be downloaded to the system (c:\windows\ccmsetup\logs) and is executed. The ccmsetup.exe reads the manifest file (and also mobileclient.tcf) and fetches the remaining files(prerequisites files listed below ) that are required for the installation.
Some of the components that are used in the client deployment process includes the following:
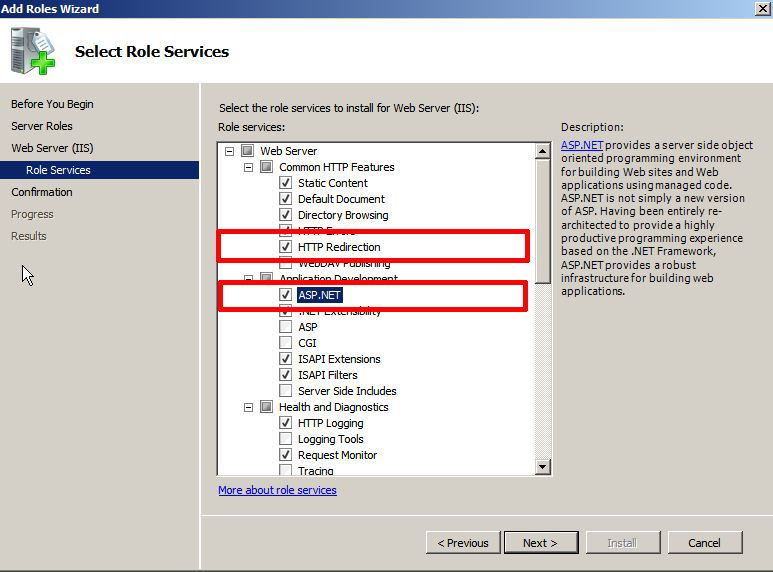
• CCMSetup.exe: Used to Install, uninstall and upgrade the SCCM 2007 client using client push installation or manual installation. It is low bandwidth aware and is the single way to launch client deployment. You also do not need to use CCMClean to uninstall the client as the uninstall switch can be used instead.You can monitor CCMSETUP.LOG ,CLIENTMSI.LOG from your ccmsetup\logs folder. It will take few min depends on your network to download and execute the files to complete the installation .Once you see, client installation succeeded with exit code 0 from ccmsetup.log,You may confirm that,installation is done but it doesn't mean,client is healthy and able to receive policies /send information to Management Point.We will soon check couple of logs to confirm the client is functioning as expected.
• BITS: BITS 2.0 is required for Windows 2000 clients. BITS 2.5 is used for most of the Windows operating systems with the exception of Windows Vista which uses BITS 3.0.
Note: When installing BITS 2.0 on Windows 2000 SP4 machines, a restart is required. This means that if you do not have BITS 2.0, then ccmsetup will stop the install and wait until the next process of reboot before it starts the next process.
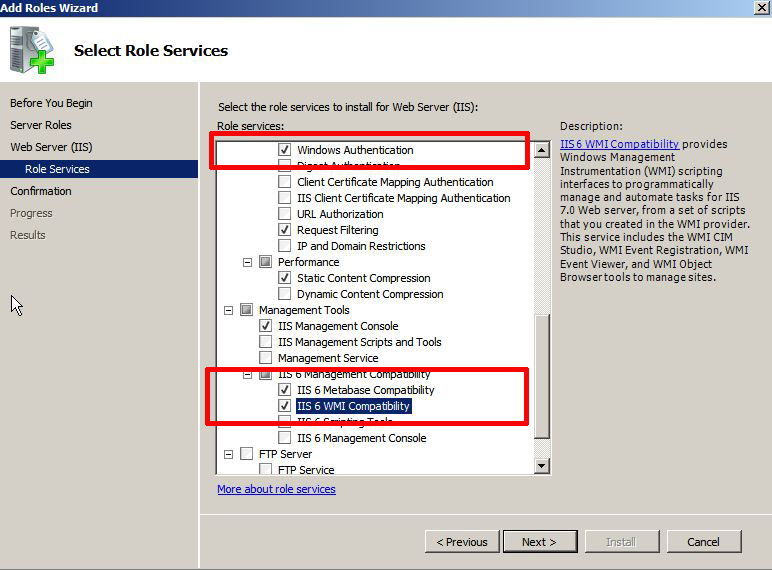
• Microsoft Windows Installer v3.1 v2 (KB 893803): Update to all operating systems except Windows Server 2003 SP1 and later
• Windows Update Agent (WUA) version 7.0.6000.363: Used on clients to support detection of applicable updates and deployment
• MSXML6.msi - Windows installer script for installing the Core XML Services
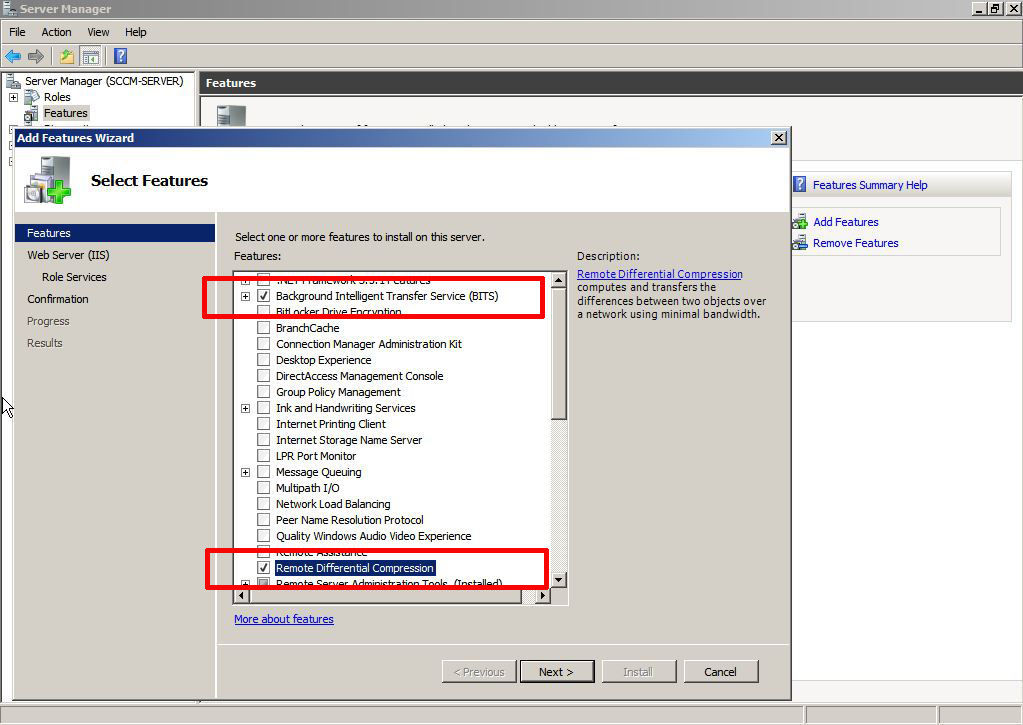
• MSRDC (Remote Differential Compression): Required for branch DP to support binary differential replication. For more information on binary differential replication, please visit http://technet.microsoft.com/en-us/library/bb693953.aspx .
Regarding windows 2000 clients, they don't support MSRDC, so Windows 2000 clients cannot be branch DP’s. Windows XP and later will install this utility and the associated windows server code will be used to install the bits.
• Wimgapi.msi: Imaging API for custom tools for image management
• CCMSetup.msi: Windows installer package for deploying of the SCCM 2007 client using AD GPO. You cannot run CCMSetup.msi to install clients manually.
Below are the SMS Related services which should (applicability depends on the client perform actions let say BITS is not used when you run the Application from DP) be running on the Client to be healthy all the time.
- Automatic Updates
- Background intelligence Transfer service
- Remote Registry
- SMS agent Host
- Terminal Services
- Windows Installer
- Windows Management Instrumentation
CCMSETUP.LOG----->Logs the Client installation activities
ClientIDManagerStartup.log-->Records the creation and maintenance of client GUIDS and also the registration status of the client computer. you should look at this log if the client registration is completed or not before it reports to console.
ClientLocation.log----> Records site assignment tasks. Can help to troubleshoot scenarios where the client is not assigned to a Configuration Manager site.
LocationServices.log---> Records attempts to find management points and distribution points.Can help to troubleshoot scenarios where the client cannot find a management point or distribution point.
After reading above logs,you should see that,client is able to registered and able to talk to Management point.
You can now open the configuration manager Applet from control Panel and go to actions tab,check if you are able to if you are able to see more than 5 actions(total around 11) displaying or not which means that client is healthy and is ready/sent its inventory information to SCCM site server. You should be able to see the Client with SCCM client Installed and assigned Yes

more information about SCCM client log files,please refer TechNet
Now its time to do the actual troubleshooting why client is not getting the above policy agents or not reported to SCCM console with Client YES and Installed YES
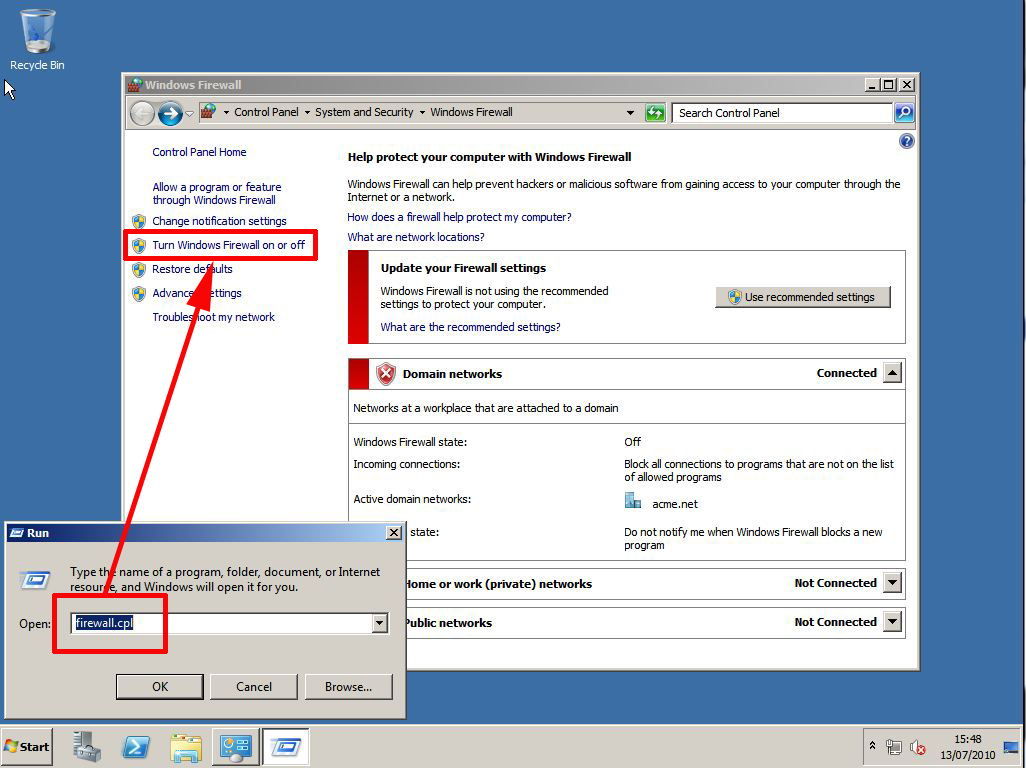
1.Check the Firewall Enabled or Disabled if enabled,allow the ports to talk to site server.Guide to add Ports to the firewall to allow the required files or policies to download.The above check list what is given should help you to start troubleshooting the client.
2.Check Boundaries (could be (AD site or IP Range or IP Subnet) of the Agent are specified in the site server
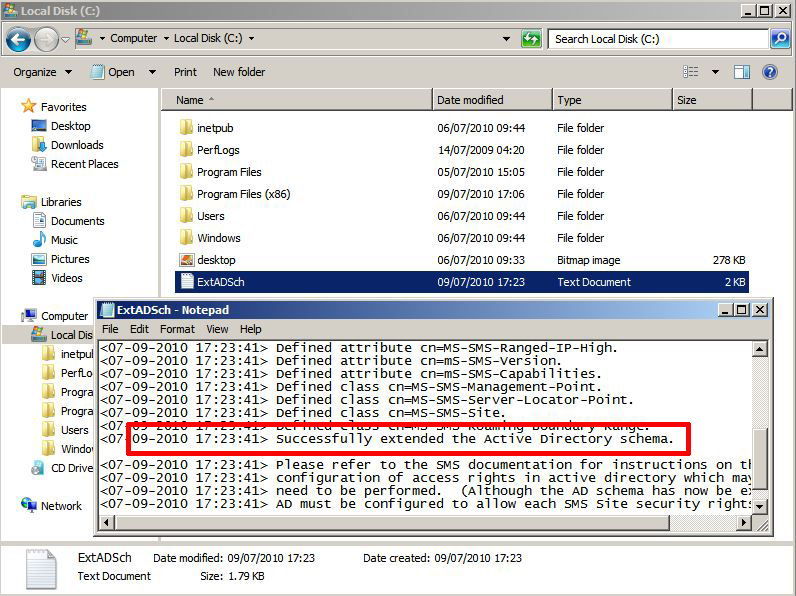
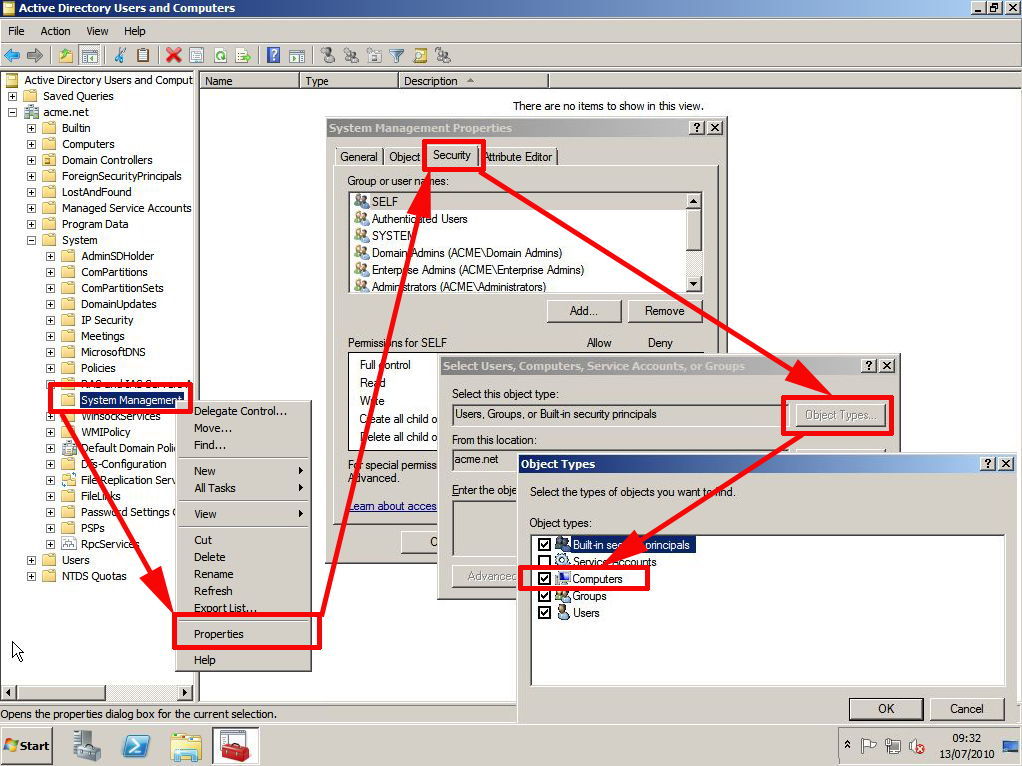
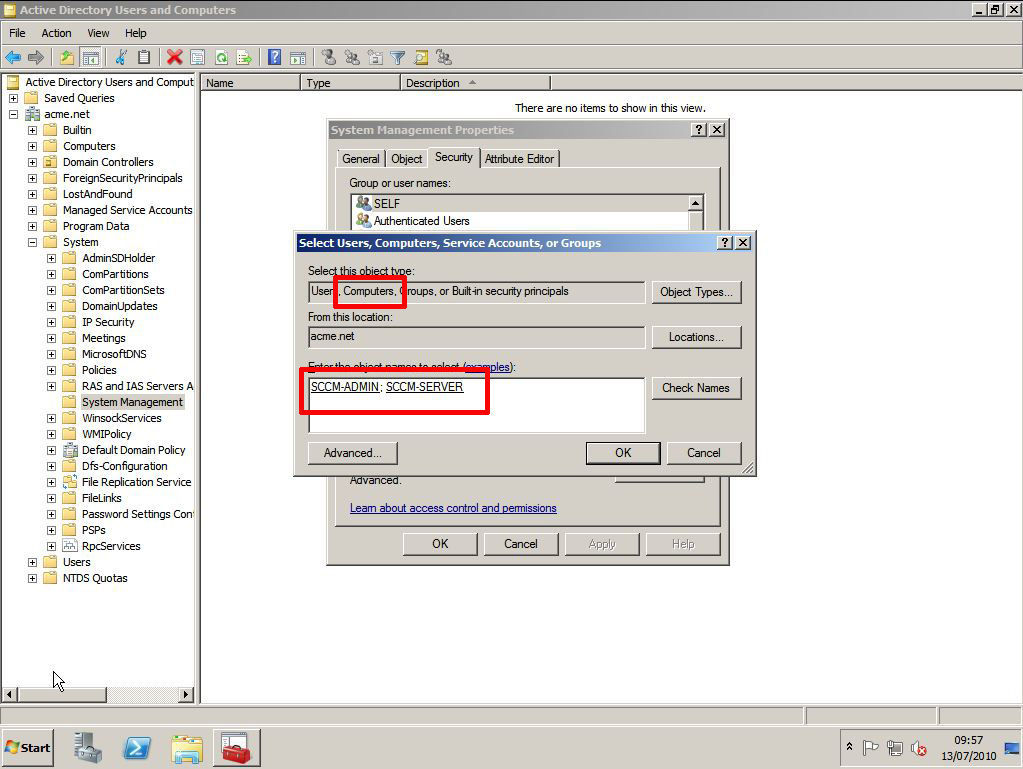
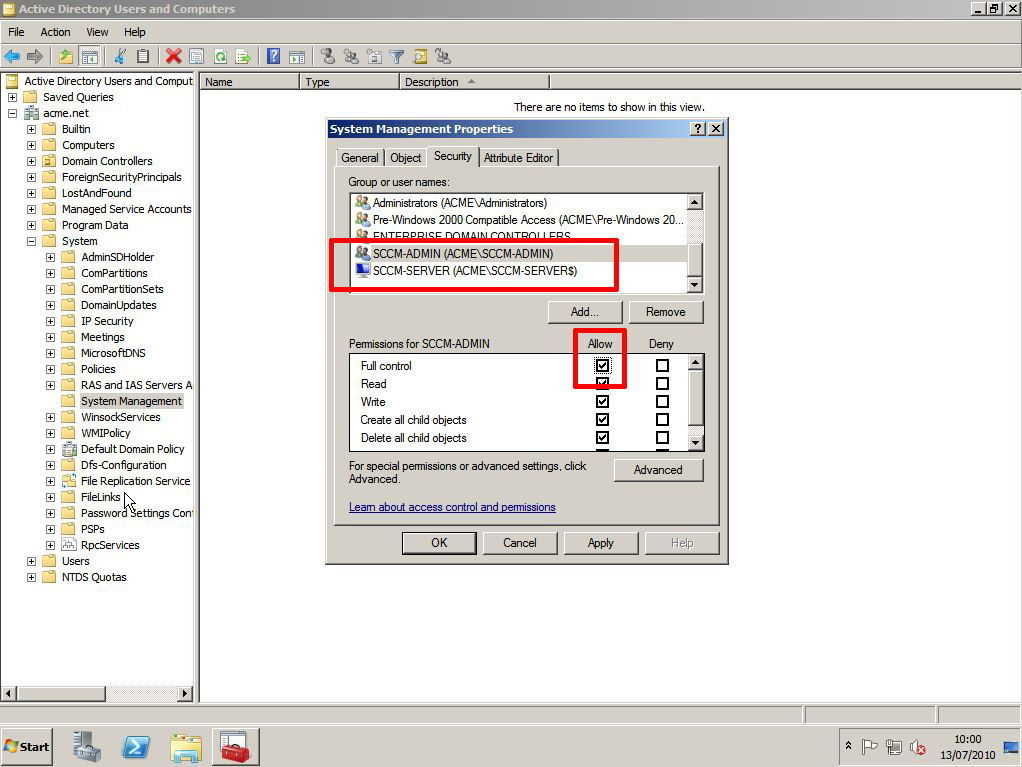
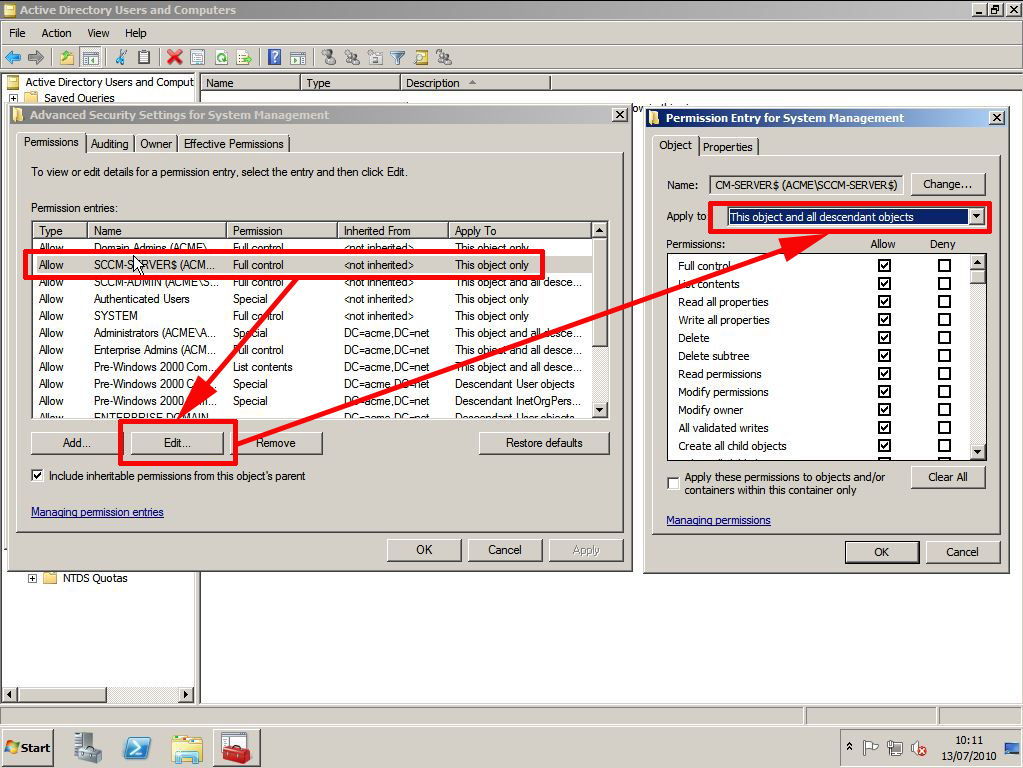
3.Schema extension and ensure attributes published into AD system management container (you can see component status if there are any errors while updating the system Management container with attributes)
4.Check the if there no DNS issue in the client and that client is able to resolve the SCCM server NetBIOS as well as FQDN without any issues.
5. Check if the Client is able to talk to Management Point or not using the following Links.
http://<SCCM_SERVER/SMS_MP/.sms_aut?mplist ----should give you list of management points.
http://<SCCM_SERVER/SMS_MP/.sms_aut?mpcert------should give you some random numbers
6.Check if WMI is working or not ,if not try repairing the WMI by stopping WMI service and renaming repository folder (C:\Windows\System32\wbem) and start the service.
If the above test fails make sure that MP is working fine. You can check mpcontrol.log on the site server to find if MP is working or not .
If you have any questions /feedback on the check list ,you can always leave a reply via comments section.